Showing posts with label Poultry. Show all posts

Monday, May 1, 2017

Hormel No Salt Added Canned Chicken Breast

NSA Canned Chicken Breast
I read about this product on a couple of low sodium Facebook groups and was curious. I managed to find it at my local Safeway, in the section with canned tuna. So I bought a couple of cans just to experiment with. I wanted to see if it would be worth keeping a few cans on hand “just in case.”

Only 80 mg sodium per 2 oz serving
The first thing I made was chicken salad. Nothing really special. Just the drained chicken chunks mixed with mayo, freeze-dried chives, celery seed, and some NSA curry powder. I added a bit of broth from the can, so I didn’t need to overdo the mayonnaise. And I added a tablespoon of whipped cream cheese to give a creamier texture. Served with super low sodium whole wheat matzos, it was a pretty easy and good tasting lunch. So, the next time I was at Safeway, I bought a few more cans.

Chicken Salad Spread with WW Matzos
It didn’t take long before I had one of those “just in case” days. I had been busy with all kinds of errands and didn’t plan ahead for dinner. Then, all of a sudden, I realized it was 5:00 p.m. What to do? I didn’t have enough time to thaw anything from the freezer, and I didn’t have the energy to go shopping. Then I remembered I had canned chicken, my homemade “Stove Top” stuffing, and NSA chicken broth in the pantry. A perfect solution! Chicken in gravy served over stuffing. So that’s what I made. It all came together quickly and produced a tasty meal.

Chicken in Gravy with Homemade Stuffing
What’s the verdict? Well, let me be frank. The canned chicken is not as good home cooked real chicken breasts. That’s why I like to roast or poach several at a time and freeze for later. That said, it’s fine for those times when you need some extra help. Those days happen, even to the best of us. I like the idea of being able to quickly pull low sodium meals from my pantry, and the canned chicken will be a welcome addition.

Saturday, May 25, 2013

Chicken Piccata


At first glance, chicken piccata and low sodium don’t seem to go together. Usually piccata dishes are made with salty capers. But Ann, from Thibeault’s Table, makes piccata with dried green peppercorns.

From Penzeys Spices:
Green peppercorns come from the same Indian vines as our robust black Tellicherry peppercorns, but are harvested before they mature, yielding green pepper with a fresh, clean flavor... Dried green peppercorns can be ground in a peppermill like black peppercorns or crushed between your fingers.
Ann is a wonderful cook and is always willing to share recipes and helpful techniques. Her use of green peppercorns is inspired and creates another way to make delicious low sodium sauces.

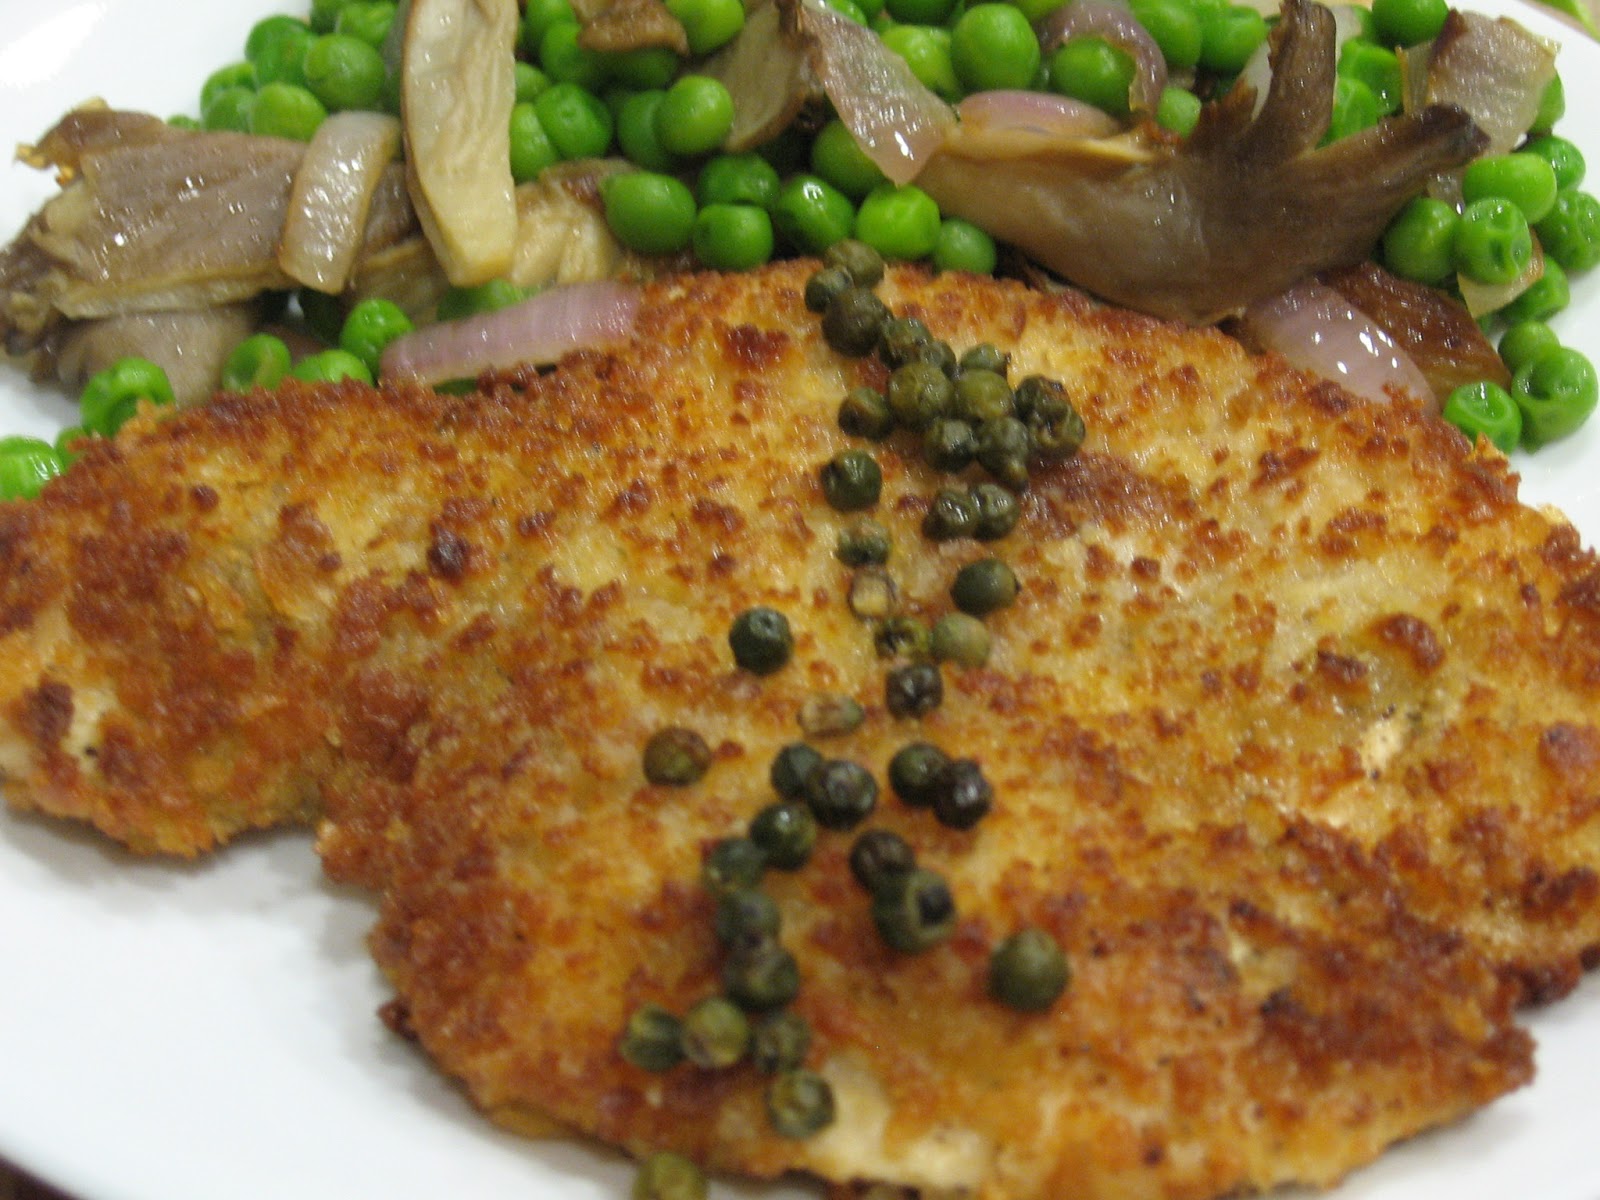
A few nights ago, I couldn’t decide what to make for dinner. Hoping for some inspiration, I defrosted a package of two salt free boneless, skinless chicken breasts. The pieces were rather large, so I cut one in two and pounded it thin. (I saved the 2nd piece for another day)

Following Ann’s guidelines, I brought 1 cup of no-salt-added chicken broth to a boil and added a tablespoon of green peppercorns. Then I turned the heat down to reduce the broth while I cooked the chicken pieces.

I wasn’t in the mood to fuss with anything, so I just sprinkled the chicken pieces with Penzeys’ Sunny Spain lemon pepper. Then I dipped the chicken in an egg wash and dredged in homemade low sodium bread crumbs. Sauteed quickly in oil until each side was well browned. Then drained on paper towels.

Back to the sauce -- I could have added cream or created a light roux, but I didn’t. I was tired and running late, so I simply added the juice of half a lemon and a tablespoon of butter. In my rush, I forgot to include some lemon zest and some parsley I had pulled out of the fridge. But it didn’t matter! I poured the sauce over the crispy chicken pieces, scooped up some peas, and served dinner. Delicious, crispy, tangy, with a peppery zing! And low sodium too! Thanks, Ann, for the inspiration.

Here’s my low sodium adaptation of Ann’s recipe:

Chicken Piccata
(Printable Recipe)

2 boneless, skinless chicken breasts,  cut in half and pounded thin
(substitute veal scaloppini or pork tenderloin)
flour
low sodium breadcrumbs (if desired)
1 egg, beaten (if making crumb-crusted piccata)
olive oil
garlic

Piccata Sauce:

1 to 2 teaspoons butter
1 to 2 teaspoons flour
1 cup no-salt-added chicken broth
lemon zest
juice of one lemon
1 tbsp. Green Peppercorns (add more if desired)
1/4 cup fresh chopped parsley

Bring chicken broth to a boil and add peppercorns. Allow to sit for 10 or 15 minutes to soften.

Heat oil in skillet. Dip veal/chicken into seasoned flour and saute one or two at a time, quickly on each side. Remove from pan. (Optional: omit flour; dip veal/chicken in egg wash and then dredge in breadcrumbs)

Heat tablespoon butter, 1 to 2 teaspoons flour, cook for a couple of minutes (do not brown), add minced garlic. Add chicken broth with peppercorns and simmer until reduced. Add lemon zest and lemon juice. Place the meat back into pan and simmer until reheated. Sprinkle with fresh chopped parsley

Serve with either a side of pasta or with potatoes and vegetables.

To see Ann’s beautiful picture and original recipe, click HERE. To see another of Ann’s green peppercorn sauces, this time with beef, click HERE.

Sunday, November 4, 2012

Homemade Smoked Turkey Breast

I'm not talking about the stuff you can buy at grocery store delis. I'm talking about home-smoked turkey breast -- and turkey legs, beef brisket, pork shoulder, tri-tip, etc. Yes, after years of talking about it, I finally broke down and bought a smoker. I got an electric one because I knew I was going to be the only one using it, and I didn't want to fuss with gas, charcoal, or pellets. I got a relatively inexpensive Masterbuilt 20 inch electric smoker at my local Home Depot. I didn't want to spend a lot of money on special bells & whistles because I wasn't sure how I would like it. Well, the verdict is in: I like it a lot!
I started using it about 3 weeks ago, and so far, I've smoked a pork shoulder and brisket with mesquite wood chips. And this last weekend I smoked a turkey breast, 3 turkey legs, and a tri-tip with hickory wood chips. In fact, we just got done eating a smoked turkey sandwich complete with mayo, horseradish sauce, cranberry sauce, and lettuce on whole wheat buns. All I can say is, "YUM!."

My reason for trying out a smoker is simple: Smoked meat tastes good! Even without using any salt! My husband really likes smoked meats, but, as we all know, most smoked meat products are prohibitively high in salt. Having my own smoker means I can give him meals he'll really enjoy but without the sodium. I realize that many experienced smokers brine their meats to guard against dryness. Of course, I don't use that method. I use a homemade no-salt-added dry rub to season the meat before letting it rest over night. Then the next day I smoke the meat.

Each cut of meat requires specific methods for cooking, so I refer to two great websites: Dadgum,That's Good, the official Masterbuilt site and Amazing Ribs. I was really worried that I wouldn't be able to get the hang of it. Now I realize I was worried for nothing. Using the smoker is quite easy, and the results are wonderful.
Last week, I used the meaty pork shoulder bone to make some wonderfully smokey baked beans. No more worrying about trying to remove salt from commercially-smoked ham hocks. I smoked the turkey legs this weekend specifically for soups & beans, and I plan on buying some turkey wings for the same purpose.

All in all, I'm very pleased with my new toy. It allows me to add smoked meats to our diet without worrying about sodium content.

Monday, July 30, 2012

Greek Food Festival - Lemon Chicken


So delicious to eat and lovely to look at! No one would guess just how easy this classic Greek dish is to prepare! It’s hard to believe that just six ingredients could result in such a sumptuous meal. One great thing about this chicken recipe is that you can tailor it to your tastes – all white meat, all dark, a combo of the two, even skinless and boneless. The marinade also works well with pork.
I use bone-in chicken pieces with the skin attached, usually baking the pieces in a large roasting pan. However, the chicken may also be grilled. Put all the pieces in a metal pan and use your grill like an oven. Or you could grill pieces individually on well-oiled grates over indirect heat.


This recipe makes about six servings, depending on appetites and dishes served alongside. However, it is easily cut in half. If I’m making half a recipe, I usually just use my toaster oven. I’m a garlic/lemon/oregano fan, so I typically use the larger measure of those ingredients. Feel free to adjust quantities to suit your individual taste.

Many Greek families traditionally bake this chicken along with potatoes. Toss peeled potato chunks or wedges with the marinade and add to roasting pan with the chicken. You can use just about any potato you like – Yukon Gold, red, russet, etc. You may need to add up to a cup of water or chicken broth to the baking pan to insure that the potatoes cook thoroughly and do not stick. Just be sure to pour the water into one corner of the pan, not on top of food. Don’t wash off the flavorful marinade. Also, if the chicken is done before the potatoes, remove the pieces and cover with foil while the potatoes finish cooking.


Greek Roast Lemon Chicken (Kota Lemonato)

2 pounds chicken pieces (Use chicken that has not been processed with salt.)
(Optional: 2-3 pounds potatoes)

Marinade:
¼ cup olive oil
3-5 garlic cloves, crushed or finely minced
Juice of 2-3 lemons
1 teaspoon freshly ground black pepper
2-3 tablespoons dried oregano

Remove excess fat and skin from chicken pieces. (Remove all skin, if desired.) Place pieces in non-reactive roasting pan.

Combine the marinade ingredients. Pour marinade over chicken and toss to coat all the pieces. Let chicken marinate while preparing potatoes, if using. Turn chicken pieces at least once during marinating time. Place chicken pieces so the skin is facing down on the pan bottom. If using, add potato pieces and toss to coat with marinade. Arrange potato pieces around chicken.

Bake at 375° for about 30 minutes. (If using skinless, boneless chicken pieces, bake for only 15-20 minutes.) Carefully remove hot pan from oven and gently turn over the chicken pieces so the skin is facing up. If needed, add water or broth to the pan to insure the potatoes cook thoroughly and do not stick.

Bake an additional 30 minutes, until chicken is completely cooked, tender, and skin is slightly browned. (If using skinless, boneless chicken pieces, bake for only 10-15 additional minutes.) If the chicken is done before the potatoes, remove the pieces and cover with foil while the potatoes finish cooking. Continue baking until potatoes are tender, adding more water if necessary.


Sunday, April 1, 2012

Curried Chicken Salad

A roasted or grilled whole chicken is great when you’re on a low sodium diet. You can rub the bird with just about any salt-free spice blend you can think of and get a wonderfully flavorful meal. I usually end up buying 4-5 pound chickens, so I can get several meals out of one cooking session. A few days ago, I roasted a Greek-style chicken, rubbed with lemon juice, garlic, and oregano. The chicken weighed almost six pounds, and I ended up with a lot of breast meat leftover. Just perfect for chicken salad, and this time I wanted a curry zing to it. The end result was delicious stuffed into low sodium pita breads. There was plenty left over for another day’s lunch too.

 I used my usual concoction for creamy sandwich fillings – a combo of mayonnaise and sour cream or yogurt. This base is creamy but lower in sodium than an all mayonnaise base. It’s also more moist and sumptuous than an all sour cream or an all yogurt base. Of course, I look for the lowest sodium mayo, sour cream, or yogurt available at my local grocery store. I also like to add a few tablespoons of leftover chicken broth/dripping to chicken salad. It boosts flavor while not adding salt.

Here’s what I did. Although there’s no real recipe and no exact quantities, you can get the idea. I didn’t include any fruit, but I know some people enjoy the combination of fruit and curry.

Curried Chicken Salad
(Printable Recipe)

Dressing:
Equal parts mayonnaise and sour cream or yogurt (I used approximately 1/4 cup each.)
1 tsp. salt-free curry powder or to taste
1-2 tbsp. low sodium chutney (I used a mango-chili chutney from my local farmers market)
2-3 tbsp. of NSA chicken broth
Lemon or lime juice or a sprinkle of vinegar (Add if the dressing seems "flat")
For even more zest, add some finely chopped jalapeno, a couple of drops of chili oil, or some crushed red pepper flakes.


Salad:
Cooked chicken, shredded, or chopped
Thinly sliced or slivered toasted almonds
Thinly sliced or chopped celery
Thinly sliced green onions or finely chopped red onion
Finely chopped red bell pepper, if desired
Dried fruit such as raisins, cranberries, or apricots, if desired
Fresh fruit such as halved grapes, pineapple chunks, or apple, if desired
Canned fruit such as pineapple chunks or mandarin oranges
Coconut, if desired

Sunday, November 8, 2009

"Winner, Winner, Chicken Dinner!"

A line from my husband's favorite movie, 21. And that's what we had last night, a chicken dinner. And it was, indeed, a winner! All my local grocery stores have had Foster Farms whole chickens on sale lately. A couple of days ago I was shopping and decided on a whim to pick up yet another whole chicken. Foster Farms is a California brand and all their fresh chicken products are free of the saline solution found in other brands. So when their chicken parts are on sale, I usually grab up several packages at a time.

Roasting a whole chicken is one of the easiest and tastiest meals for anyone watching their sodium intake. The chicken really does not need any salt if it is seasoned correctly. So many flavor combinations are possible: lemon with oregano or rosemary or thyme; tarragon with chopped shallots and artichoke hearts; Cajun or Creole; barbecue rub and/or sauce; poultry seasoning; South-of-the-Border chili powder; garlic... Basically, if you can dream it up, you can probably season a roasted chicken with it. Of course, it goes without saying, that the seasoning blends should be salt free and any sauces should be extremely low in sodium content.

One of my favorite blends for whole roasted chicken is Penzy's Mural of Flavor. It's a mild all-purpose seasoning that's simply wonderful with chicken and pork. Preparing the 4-1/2 pound chicken was easy. I cut off the big globs of fat, removed the innards, and wiped it down (inside & out) with paper towels. Then I sprinkled and rubbed Mural of Flavor all over it. I placed the seasoned bird on a rack in a baking pan just a little bit larger than the chicken, and I put it uncovered in the refrigerator to completely dry out. I also placed two crumpled up paper towels in the cavity to absorb any excess moisture. About 45 minutes before roasting, I took the chicken out of the fridge to lose the chill. I also removed the paper towels from the cavity and seasoned it with some Mural of Flavor. I pre-heated the oven to 450 degrees and roasted the chicken, breast side down for about 45 minutes. Then I flopped it over and continued roasting it for about another 20 minutes. I didn't use a thermometer, just wiggled the legs, took it out and let it rest.

While the chicken was resting, I made a quick side dish of Lower Sodium Stove Top Stuffing. When prepared according to package directions, it has about 250 mg. sodium per 1/2 cup serving. Whenever I make it, I always add some vegetables to cut the sodium content even more. This time I added about 3/4 cup each of chopped celery and onions that I sauteed in 2 tbsp. of unsalted butter.

And there you have it. Chicken and stuffing served with a small salad. There are enough leftovers for tonight's dinner and chicken salad sandwiches for tomorrow's lunch. "Winner, winner, chicken dinner!"

Sunday, June 14, 2009

Fried Chicken

Extra Crispy Fried Chicken
Every once in a while both my husband and I get a hankering for fried chicken. What’s not to like? It’s crispy & delicious. Plus if you fix it yourself, you can also make real cream gravy to smother mashed potatoes or biscuits with. I’ve tried various ways of preparing the fried chicken: just a simple flour coating; soaking in buttermilk; dredging in flour, then an egg wash dip, followed by another coating of flour; frying immediately after dredging; & even letting the coating “set” for a few minutes… Each method produced decent, tasty chicken.

Not long ago my local PBS station started showing Cook’s Country, another cooking program from the producers of America’s Test Kitchen. I happened to catch an episode devoted to fried chicken. I watched, hoping to pick up some helpful tips. The technique used was pretty close to what I was already doing but with a few tweaks.

A Soapbox Rant: I really have a problem with the present obsession with either salting or brining meat. I get tired of almost every pork or poultry recipe in just about every cooking magazine or cooking show starting with salting/brining as the first step. And always accompanied by some sort of phraseology implying that the only way to ensure juicy, tender meat is to salt or brine it. The producers of Cook’s Country and Cook’s Illustrated magazines and the America’s Test Kitchen TV show are in that camp. So, of course, their fried chicken recipe begins with a buttermilk/salt brine. Naturally, I stuck with my tried and true plain buttermilk soak.

However, the recipe also included an interesting twist. The recipe testers discovered that the addition of a dribble of buttermilk mixed with the flour produced a crispy coating with delicious crunchy bits. I gave the technique a try and was quite pleased with the results. Since then, I’ve made the fried chicken two additional times, using various bone-in cuts. The recipe produces a really crispy and crunchy fried chicken. And juicy too! Even without brining in a salt solution. (By the way, the real key to tender, juicy meat is to not overcook it. Pretty simple! A good instant probe thermometer is a valuable tool.) Here’s my adaptation of the Cook’s Country recipe:

Extra-Crunchy Fried Chicken
(Printable Recipe)

2 cups buttermilk plus 6 additional tablespoons (I use Knudsen brand, a very low sodium product)
1 whole chicken, about 3 1/2 pounds, cut into 8 pieces (I usually fry bone-in thighs or sometimes boneless, skinless breasts)
3 cups all-purpose flour
2 teaspoons no sodium baking powder (I use Hain Featherweight)
3/4 teaspoon dried thyme
1/2 teaspoon ground black pepper
1/4 teaspoon garlic powder
Vegetable oil (I use only about ¼ - ⅓ inch of oil)
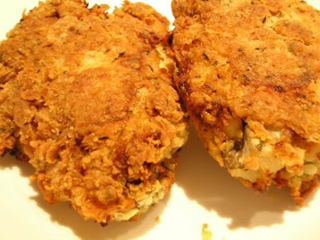
Crispy, Crunchy, and Delicious!

1. Combine 2 cups buttermilk and chicken pieces in large bowl and stir to coat; cover bowl with plastic and refrigerate for 1 hour. (I use enough buttermilk to completely cover the chicken pieces and season it with a dash of Tabasco. I let the chicken soak for at least two hours.)

2. Whisk flour, baking powder, thyme, pepper, and garlic powder together in large bowl. Add remaining 4 - 6 tablespoons buttermilk; with your fingers rub flour and buttermilk together until buttermilk is evenly incorporated into flour and mixture resembles coarse wet sand.

3. Working in batches, drop chicken pieces into flour mixture and turn to thoroughly coat, gently pressing flour mixture onto chicken. Shake excess flour from each piece of chicken and transfer to wire rack set over rimmed baking sheet.

4. Heat oil in large heavy-bottomed Dutch oven or skillet with 11-inch diameter over medium-high heat until it reaches 375 degrees. [I use a straight-sided frying pan and pour in only about ¼ - ⅓ inch of oil. I don’t use a thermometer.] Place chicken pieces, skin-side down, in oil, cover, and fry until deep golden brown, 8 to 10 minutes. Remove lid after 4 minutes and lift chicken pieces to check for even browning; rearrange if some pieces are browning faster than others. Adjust burner, if necessary, to regulate temperature of oil. Turn chicken pieces over and continue to fry, uncovered, until chicken pieces are deep golden brown on second side, 6 to 8 minutes longer. At this point, to keep chicken from browning too quickly, you may want to turn the heat down a bit. Using tongs, transfer chicken to plate lined with paper towels; let stand for 5 minutes to drain. Serve.

Update: I've found that I get almost the same result by putting all my flour in a plastic bag and dropping the buttermilk soaked chicken pieces in individually. A couple a shakes and then a quick massage in the bag keeps my hands cleaner yet still gets the bits of flour/buttermilk clumps on the chicken pieces.


Friday, January 2, 2009

Turkey Scrapple

According to Wikipedia, "Scrapple is a savory mush of scraps and trimmings combined with cornmeal... The mush is formed into a loaf, and slices of the scrapple are then fried before serving. Scraps of meat left over from butchering... were made into scrapple to avoid waste... Scrapple is typically made of hog offal, such as the head, heart, liver, and other scraps, which are boiled with any bones attached (often the entire head), to make a broth... Scrapple is arguably the first pork food invented in America. The first recipes were created more than two-hundred years ago by Dutch colonists who settled near Philadelphia and Chester County, Pennsylvania in the 17th and 18th centuries."

OK, so that's the history of pork scrapple in the United States. So how did turkey scrapple end up becoming a tradition in this California Greek's household? Well, years ago, before I was married, a friend from church came over to my parents' house for Thanksgiving dinner. Somehow, during the course of the preparation & cleanup, she described how she used the turkey carcass to make scrapple. It sounded really interesting to both me and my mom. My mother decided to give it a try, and we both loved it. I've been making it on my own for over 30 years now. Every roast turkey dinner results in scrapple for breakfast. I like this tasty solution to the turkey carcass quandary a lot better than the usual turkey soup.

After slicing off the turkey meat, I gather up all the bones & skin and dump everything into a huge stock pot covering everything with water. I add a chunked up onion, carrot, and celery stalk. I also add a couple of large pinches of dried rosemary, thyme, & sage. I'll throw in 3-5 whole allspice berries and at least a teaspoon of whole black peppercorns too. Finally, I'll add a bayleaf or two and maybe even a couple of cloves of garlic cut in half. Bring all this to a boil, lower the heat, and let it simmer for hours upon hours.

When the turkey stock is rich and flavorful, I'll strain out the solids and pick through the cooled bones to pull out meaty chunks.  Most of the time I roast a 12-14 pound turkey, so I'll end up with quite of few nice meaty scraps. I'm very careful to not include bones or cartilage in my meat pile. I refrigerate the remaining broth overnight. The next morning I'll remove some of the fat that has congealed on the top.

I follow the basic corn meal mush recipe found on the Albers Yellow Cornmeal box (I usually make two recipes' worth). This gives me the correct proportions of liquid to cornmeal. However, I cook the cornmeal in the turkey broth until the mixture is super thick. Then I add the reserved turkey meat scraps and cook an additional 20 minutes. I also add some sage and thyme to the cornmeal while it's cooking, sometimes finely chopped onion too.

When the scrapple mixture is so thick that I can hardly stir it, I spoon it into Pyrex loaf pans that have been lightly sprayed with Pam. I let the scrapple loaves cool completely, cover them, and refrigerate. To absorb any condensation, I usually put a folded paper towel on top of the loaves before covering.

The next morning, I cut 1/2 inch slices and dredge them in flour (I prefer thick slices). I fry them in a couple of tablespoons of oil over medium-high heat for 5-7 minutes per side. I like them really crispy and really browned. I usually fry up enough for 2-3 slices each, depending on how hungry we are. I think we could probably eat an entire loaf's worth at one sitting, but I try to exert some form of self control. I serve the crispy turkey scrapple slices with a drizzling of either honey or maple syrup. Leftover turkey gravy or cranberry sauce is good too.

Turkey Scrapple
(Printable Recipe)

3-1/2 cups broth, divided
1-1/4 cups Yellow Corn Meal
1 tsp. Sage
1 tsp. Thyme
Optional:
1 tsp. Rosemary
1 tsp. Dried onion


I warm the refrigerated & defatted broth in a dutch oven over low heat. I measure out the amount of broth I'll need for one (or maybe two) recipes of corn meal mush. I set aside whatever broth will not be used. Then I pour about 1-2 cups of warmed broth into a bowl and whisk the corn meal into it. I bring the remaining warm broth to a boil in the dutch oven. I do not salt the broth. At this time, I'll add at least a teaspoon each of rubbed sage and thyme. Add optional rosemary, dried onion, if desired. While stirring constantly, I whisk the cornmeal/broth mixture into the boiling broth. I reduce the heat to low and cook for at least 30 minutes until the mixture is quite thick. Then I add the reserved turkey meat, stir it into the cornmeal mixture well, and cook on low for another 20 minutes.

Pour/scrape mixture into lightly greased loaf pans. Let cool. Cover and refrigerate until solid and cold.

Friday, February 15, 2008

Roast Turkey

A few days after Thanksgiving, I went grocery shopping. For some reason I ended up at the meat section,  staring at the different packages. One of the butchers approached me and pretty much begged me to buy a fresh turkey. He promised me he'd mark it down from its already sale price. Well, at 39 cents per pound, I couldn't resist. So I walked away with a 15 pound fresh Foster Farms turkey (Foster Farms doesn't add any enhancement solutions to their poultry). I stuck it in my freezer. Last week I finally decided to do something with it. I let it defrost in the fridge for about four days, then roasted it.

Turkey is incredibly easy and wonderfully tasty on a low salt diet. I rubbed it with herbs, stuffed the cavity with lemon halves, and surrounded the bird with chunks of carrots, celery, & onions. I threw in some whole allspice, whole black peppercorns, & a couple of bay leaves. I also poured about two cups of low sodium chicken broth into the bottom of the pan.

As soon as the cooked turkey had rested a bit, I carved it up. I put the wing tips, back, neck, gizzard, & heart in a separate container for making stock. Then I froze the two thighs & two wings. I made a delicious gravy from the turkey drippings & the broth that was in the roasting pan. We ate the legs for dinner, and I've been making hot turkey sandwiches, cold turkey sandwiches, mole, & curry with the breast meat. I really got my money's worth!