Showing posts with label Soups/Stews. Show all posts

Wednesday, December 20, 2017

Corn Egg Drop Soup

Corn Egg Drop Soup
I really like the different soups served in Chinese restaurants. I love hot and sour soup, wonton soup, egg flower soup, and corn egg drop soup. The only problem is that most restaurants over salt their broth base so much that it renders their soups almost inedible – even if you’re not following a low sodium diet. So I’ve taken to making my own versions. Easy, just as tasty, and low in sodium.
I’ve been following the recipe from the Kitchn website for the egg drop soups. Its recipe is based on a recipe from Serious Eats. You can make the soup a little different each time, depending on what you have on hand or what you’ve got a hankering for. It can be as simple or as complex as you want. The Kitchn recipe uses a hint from Serious Eats, adding a bit of cornstarch in the eggs to keep them from getting rubbery.


To make corn egg drop soup, I add at least 1 cup of NSA corn, either frozen or canned, to the basic egg drop soup recipe. If I’m in a particularly lazy mood, I’ll leave the corn kernels whole. But if I’m more ambitious, I will puree ½ cup in my mini food processor. The pureed corn adds an extra layer of corniness and sweetness that I find comforting and soothing.
The flavoring agents I always use are ginger, white pepper, low sodium soy sauce, and green onions. I also like to include small cubes of tofu, and sometimes a handful of frozen peas and carrots. For a heartier soup, I may add some finely chopped leftover cooked chicken.
The corn egg drop soup makes a great appetizer/starter to a meal or a light lunch or dinner all by itself. It reheats well too. Just heat it gently, and don’t boil it. I always add fresh green onion slivers to leftovers.

Corn Egg Drop Soup with Brown Rice & Baked Tofu
Corn Egg Drop Soup
Adapted from Kitchn
(Printable Recipe)
Soup Ingredients:
4 cups (32 ounces) NSA chicken stock/broth
1 tablespoon + 1 teaspoon cornstarch
2 large eggs
1-3 tsp low sodium soy sauce (I use Chinatown)
1 - 1 ¼ cup NSA corn, frozen and cooked or canned
Flavoring Extras: (use one or all)
Ginger: ½ -1 tsp fresh grated  or ¼ - ½ tsp dry ground, etc. (I use 1 cube Dorot ginger)
Ground white pepper (just a few pinches)
5 Spice Powder (just a few pinches)
Toasted sesame oil (just a few drops)
Hot chili oil (just a few drops)
½ cup frozen peas and carrots
Soup Extras: (use one or all)
½  block (7 to 8 ounces) extra-firm tofu, cut into bite-sized pieces
8 ounces mushrooms, thinly sliced
1 bunch baby bok choy, thinly sliced
4 green onions/scallions, thinly sliced
Water chestnuts, sliced
Chicken, cooked and finely chopped or shredded

Toppings:
Thinly sliced green onions/scallions
Toasted sesame oil
Hot chili oil
Ground white pepper
Sesame seeds (white or black)
If desired, puree ½ cup of corn. Set aside all the corn and add with the soup extras.

Heat the NSA stock/broth over medium-high heat. Add all the flavoring extras you’ve chosen to the saucepan with the stock. Turn down the heat to medium-low and simmer for 15 minutes. If using frozen peas and carrots, cook them with the stock and flavorings.

Add any soup extras to the stock and simmer for another five minutes. Save some scallions for sprinkling on top of the soup at the end.

Remove about ¼ cup stock and whisk it with 1 tablespoon of cornstarch in a small bowl. Use a spoon or a whisk to stir the soup while slowly pouring in the cornstarch slurry. Let simmer over medium heat for a couple of minutes. The soup will begin to thicken a bit.

Whisk together the eggs in a small bowl with the remaining teaspoon of cornstarch. Make sure the soup is at a slow simmer.

Use a large spoon or ladle to gently stir the soup in one direction. Slowly drizzle the egg mixture through the tines of a fork. Let the soup stand for 10 - 15 seconds, then stir gently to break up the egg to desired size.

Serve sprinkled with thinly sliced scallions.


Saturday, October 14, 2017

Vegetable Soup - The Easiest Ever!

Quick & Easy Vegetable Soup
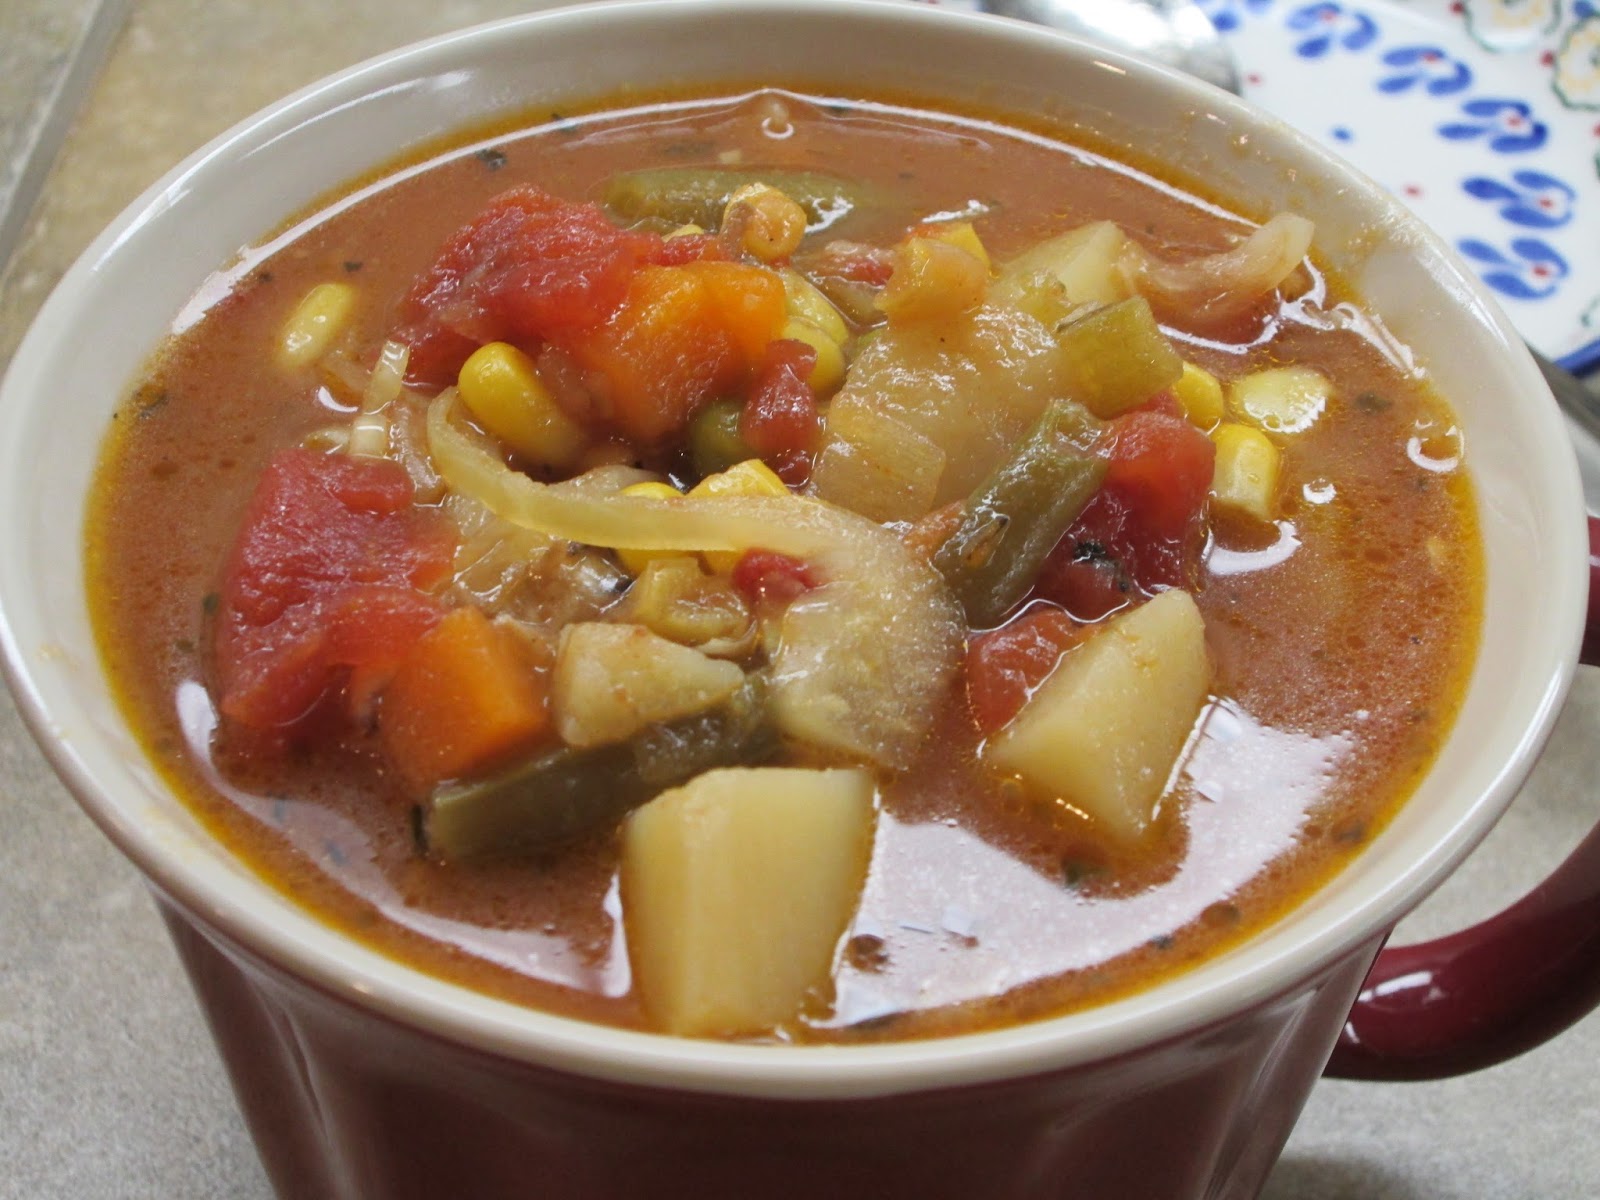
Have you ever got the hankering for soup but didn't have the time or motivation for a 2-3 hour cooking session? That’s what happened to me a few days ago. I wanted to make a soup that was chock full of vegetables, but I didn’t want to spend time and energy peeling and chopping. What to do? Look to my pantry and freezer, that’s what!

I made the soup. It was fast and easy. And it was another Pull Out wonder – pulled out of my pantry and pulled out of my freezer.

I started with frozen mirepoix – a combination of chopped onions, carrots, and celery. My local supermarkets carry store and name brands with the other frozen vegetables. And many stores also offer freshly prepared mirepoix in their produce sections. I sauted about 1½ cups of the vegetables in a couple tablespoons of olive oil.

Once the mirepoix vegetables were tender, I added a 32 ounce carton of no-salt-added chicken broth along with a can of salt-free petite diced tomatoes. For extra flavor, I added some Penzey’s dried minced garlic, a bay leaf, and several whole black peppercorns (in a tea ball). I sprinkled in about ½ tsp. of savory leaves, and I threw in a sugar cube to combat the tartness of the tomatoes.

I let the broth mixture simmer for 15-20 minutes before adding about 2 cups of frozen mixed vegetables: corn, peas, carrots, lima beans, and green beans. I also included one peeled and cubed Russet potato that needed to be used up. (Peeling and chopping the potato was the hardest bit of work involved in making the soup.) Then everything simmered for another 15-20 minutes until the vegetables were tender and the potato was cooked through.

That was it! Vegetable soup in a flash! And, believe it or not, it was quite tasty. We were in the midst of a busy week and really appreciated having a good tasting and good-for-us soup available for quick snacks or meals.

One nice thing is that the soup can be slightly different each time you make it. Use different herb blends to create different flavor profiles. Use different frozen vegetables rather than the traditional corn, peas, carrots, lima beans, and green beans blend. Try an entirely different blend or perhaps just focus on one or two vegetables. Include a bit of pasta or rice instead of the potato. Or maybe use cubed sweet potatoes for an uniquely different flavor. Maybe leave out the tomatoes altogether.

Most grocery stores carry a lot of pre-prepped vegetables in their produce sections. Same with their freezer sections. Experiment. Who knows what tasty combos you might come up with?

For example, this week, I made a fast corn-potato chowder. Same method but without the tomatoes. I flavored the chowder with poultry seasoning. Once I even stirred in a bit of cream just before serving. Next week I plan to make a minestrone style soup using a frozen Italian vegetable medley (Italian green beans, cauliflower, carrots, red pepper, and zucchini) and seasoned with a NSA Italian herb blend.
Jiffy Corn Chowder
Vegetable Soup in a Flash!

1 - 2 cups frozen mirepoix
2 tbsp olive oil
32 oz salt-free chicken or vegetable broth
14.5 oz can salt-free diced tomatoes
½ - 1 tsp sugar (if desired)
Garlic to taste (fresh, frozen cubes, dried minced, powdered, jarred)
Black pepper to taste
1 bay leaf
Herbs or spices to taste (Examples: Italian herb blend, chili powder, poultry seasoning, curry powder, thyme, basil, chives, etc.)
2 cups frozen vegetables of choice

Optional Add Ins:
1-2 cups peeled and cubed potato (russet, red, Yukon gold, sweet, etc.)
1-2 cups packaged coleslaw
Pasta – small, thin shapes that cook quickly in the soup broth (stars, alphabets, pastina, fideo, etc.)
Rice – quick cooking/instant, ready-to-serve, frozen (my local stores carry a couple of brands of fully cooked NSA white or brown rice in bowls/pouches in the pasta aisle and also in the freezer section)
Beans – NSA canned or frozen (my local stores all carry baby limas and black eyed peas along with a few other choices like black beans, garbanzos, and lentils in the freezer section)
Mushrooms – NSA frozen, canned, dried/freeze dried

Saute the mirepoix in olive oil. Once the vegetables are tender, add no-salt-added broth along with salt-free diced tomatoes. Add garlic, bay leaf, and black pepper. Add herbs of choice and sugar, if desired.

Let mixture simmer for about 15-20 minutes before adding 2 cups of frozen mixed vegetables. Add options of choice. Stir and simmer together for another 15-20 minutes until all vegetables are tender.


Tuesday, November 22, 2016

Condensed Cream of Mushroom Soup Clone


Homemade Low Sodium Cream of Mushroom Soup
Condensed Cream of Mushroom Soup is a product that a lot of people miss when eating low sodium. It’s understandable. The soup is used in so many recipes, especially casseroles. It also makes a quick and easy gravy for chicken and pork. So, what’s the problem? Unfortunately, it’s packed with sodium. There are four (4) versions of the soup available for purchase. Here’s the breakdown:

Each can holds 10½ ounces and about 2½ servings.

Regular Condensed: 870 mg sodium/.5 cup (contains MSG) = 2,175 mg sodium/can
25% Less Sodium: 650 mg sodium/.5 cup (contains MSG) = 1,625 mg sodium/can
Healthy Request: 410 mg sodium/.5 cup (contains potassium chloride) = 1,025 sodium/can
Ready to Serve Low Sodium: 45 mg sodium/can (watery and bland ‒ needs a lot of doctoring)

Ingredients: Water, Mushrooms, Vegetable Oil, Modified Food Starch, Wheat Flour, Contains Less Than 2% Of: Salt, Cream (Milk), Dehydrated Whey, Soy Protein Concentrate, Monosodium Glutamate, Yeast Extract, Flavoring, Dehydrated Garlic.

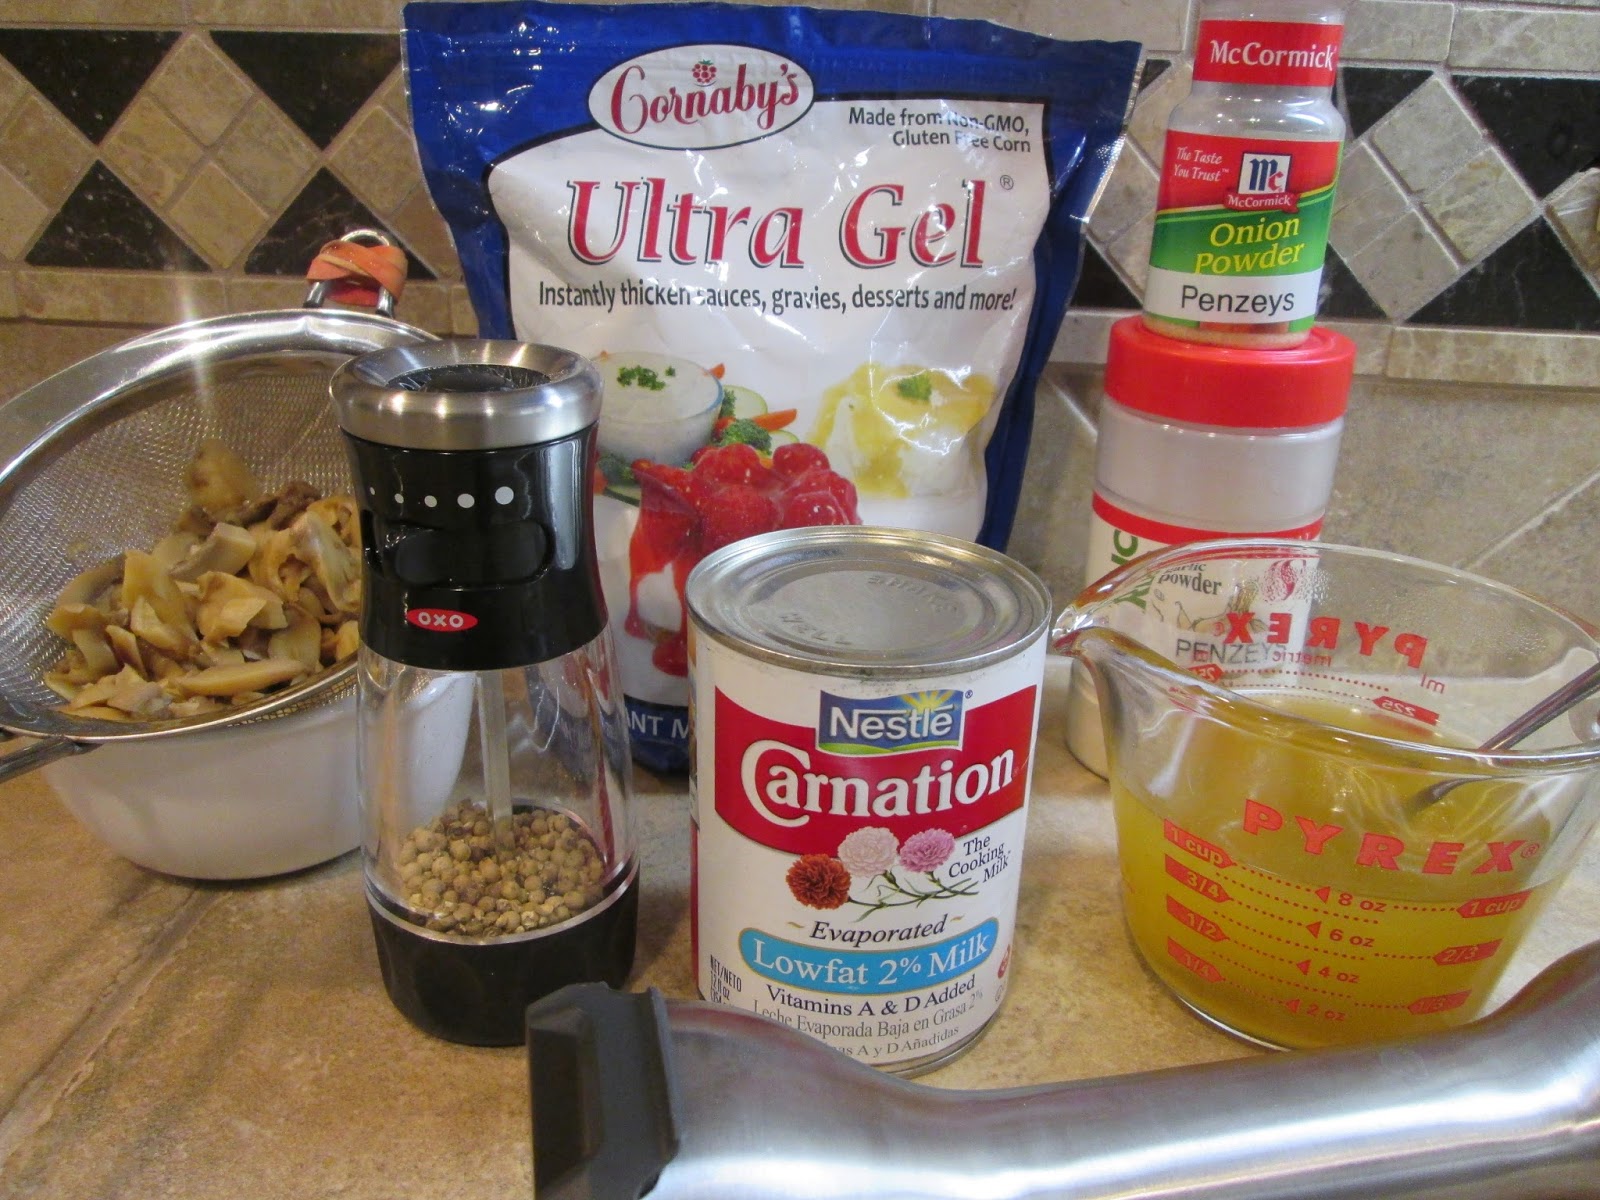
Recently a pal from the “Shakin’ the Salt” Facebook Group linked to the Salad-in-a-Jar recipe for homemade COM soup. I wanted to give it a try.  But before I did, I studied other copycat recipes and looked more closely at the ingredient list on the Campbell's label. Because milk/cream was down near the end of the ingredient list, I decided to use only 1/2 cup evaporated milk and 1/2 NSA veggie broth instead of all milk. To boost the umami flavor contributed by ingredients I wasn’t going to use, I added a teaspoon of low sodium soy sauce.  

Ingredients
I also used Ultra Gel as a thickener instead of cornstarch. It's one of my favorite products ‒ a GF modified starch that thickens both cold and hot liquids directly (no slurry or roux needed) and instantly. Plus it doesn't break down with reheating, refrigeration, or freezing.

For super duper convenience, I used Giorgio NSA canned mushrooms from Healthy Heart Market. Finally, I used my hand-held blender stick.
Hand-Held Blender Stick
It all came together easily and quickly, and that was my goal. I figured the best thing about cream of mushroom soup was its convenience. It’s thick, creamy, and, in most cases, avoids the need to make a from-scratch bechamel. (Yes, I know that sauteing fresh mushrooms in butter would boost flavor, but I was hoping to match the convenience and speed of the canned product.)

Honestly, I was quite pleased with the end result. (I used it last night in “creamed” peas.) I really like that it can be made with items I usually keep in my pantry. That makes it especially quick and easy.

The sodium content for the entire recipe came in under 300 mg. I know that the “Ready-to-Serve” COM soup is lower, but it’s so thin, watery, and tasteless, that it requires a lot of doctoring. As far as I’m concerned, it’s not worth fiddling with. This clone, however, is actually easier to prepare and the end result is thick, creamy, mushroomy in flavor, and super low in sodium. Here's my modified recipe:

Condensed Cream of Mushroom Soup Clone

¼ - ½ tsp onion powder
⅛ tsp garlic powder
Pinch sugar
1 tsp low sodium soy sauce (I use Chinatown)
2 tbsp cornstarch (I used Ultra Gel)
1 tbsp vegetable oil
Couple grinds white pepper
½ cup NSA broth (vegetable, chicken, beef)
½ cup evaporated milk (regular or 2%)
1 small can NSA mushrooms, drained (or 3/4 cup fresh mushrooms, sliced)

Put all ingredients except the mushrooms in a blender/food processor and pulse until smooth. Add mushrooms and pulse until mushrooms are coarsely chopped.

Pour into a 2 qt microwaveable bowl. Cook on HIGH for 3 minutes, whisking well after 2 minutes and again at the end of cooking time. If not thick enough, add 30 seconds and whisk again. (Because I used Ultra Gel, it thickened almost immediately. So I only cooked it for 1½ -2 minutes.)

Sodium Content: Amounts are approximate, numbers dependent on specific products used.
Evaporated Milk: 140 mg sodium
Low Sodium Vegetable Broth: 68 mg sodium
Low Sodium Soy Sauce: 48 mg sodium
NSA Mushrooms: 40 mg sodium
TOTAL: 296 mg sodium/recipe


Thursday, May 22, 2014

Tortellini Soup

Cheese-Filled Tortelllini with Vegetables

I really like tortellini – pasta pillows filled with cheese, meat, or vegetables. Unfortunately, they usually don’t make appearances at the low sodium table. That’s because most of the time, they’re smothered with salty sausage-flavored meat sauce and topped with copious mounds of cheese. But when used in a flavorful soup, redolent with onion, garlic, vegetables, and lots of Italian herbs, you get a similar flavor but without all the sodium. Plus the soup is super easy to put together quickly.

I encountered this soup a few months ago at a local diner and wondered if I could make a low sodium version suitable for my husband. So the next time I went shopping, I spent time in the freezer section checking all the frozen tortellini. I was pretty happy when I found Armanino brand cheese tortellini. The label on the package said a serving size of 25 tortellini was 105 mg sodium. However, the website shows 230 mg sodium per serving.

_________________________________________

2016 Update: Packages of Armanino frozen cheese tortellini now give 310 mg sodium/25 tortellini. This is quite a bit higher than what was previously listed. The website still cliams 230 mg. Luckily, another local store sells its house brand of frozen Six Cheese Ravioli with only 170 mg sodium/1/2 cup (113 g). The raviolis are a bit larger than the tortellinis, but the weight per serving is almost the same. So, I'll be using the frozen raviolis from now on.)
___________________________________________

I assumed that I wouldn’t be able to pack 25 tortellini into one bowl of soup and figured the final serving would be closer to 10-12 tortellini. So I bought a package and headed home to make soup.

It couldn’t have been easier. I used one carton of unsalted chicken stock and a can of NSA diced tomatoes. To the pot I added one finely chopped onion, a couple of minced garlic cloves, a bay leaf, two peeled and sliced carrots, two sliced celery stalks, a tablespoon of salt-free Italian herb blend seasoning, and a couple grinds of black pepper. I simmered the vegetables in the broth until just tender. Then I added 20 – 24 tortellini. Once the tortellini was cooked through, I served the soup with some homemade low sodium bread. The soup was everything I had imagined – flavorful with enough chewy and cheesy tortellini to satisfy. As an added bonus it was unbelievably easy to prepare.

I’ve made it several times since that first experiment adding other vegetable with good results – coarsely chopped cabbage, sliced mushrooms, sliced leeks, frozen Italian green beans, chopped zucchini, and chopped fresh basil. (My favorite additions are leeks and fresh/frozen basil leaves.) However, I only use one or two additional veggies. I don’t want to distract from the brothy goodness. And when I have the time, I usually lightly sauté the onion and garlic. If I use extra vegetables, I sometimes use less than one serving’s worth of tortellini. That means even less sodium per bowlful.

It’s now my go-to quick meal when I don’t have anything planned, thawed, or am feeling under-the-weather. I make sure I always have a carton of chicken stock, a can of diced tomatoes, and a package of frozen tortellini ready for a last-minute yet satisfying meal. Leftovers are good the next day as part of lunch, and the recipe can easily be doubled.

Here’s the recipe, if you can call it that. It’s more a method rather than an exacting recipe. Feel free to add vegetables you enjoy. And good luck finding a fairly low sodium tortellini product in your grocery store.

Tortellini Soup
Serves 2 with leftovers
(Printable Recipe)

32 oz. no-salt-added chicken stock/broth
1 14-1/2 oz. can diced/petite diced no-salt-added tomatoes
2 tbsp. olive oil
1 onion chopped
2 garlic cloves, finely minced
1-2 carrots, peeled and sliced or chunked
1-2 celery stalks, sliced or chunked
1 bay leaf
2 tsp. or more Italian herb blend (no-salt-added)
Freshly ground black pepper
1 package low sodium frozen cheese tortellini/ravioli

Optional: (use only 1 or 2 additional vegetables)
Chopped fresh herbs such as basil, oregano, thyme, parsley
Additional vegetables such as coarsely chopped cabbage, thinly sliced mushrooms, thinly sliced leeks, frozen Italian green beans, and chopped zucchini

If desired, sauté onion in olive oil until translucent. Add garlic and continue sautéing for another minute or two.

Add broth and tomatoes, bringing to a simmer. Add the vegetables and herbs; simmer until vegetables are just tender.

Add the number of frozen tortellini for one serving or less. Bring soup to a boil; lower heat; and simmer until tortellini is completely cooked.

Serve with an additional dusting of freshly ground pepper, a sprinkle of chopped fresh herbs, and a swirl of regular of flavored olive oil.

Sunday, March 27, 2011

Rain Storms and Chili

It’s been cold and wet for the last two weeks. A perfect time for a pot of chili. Normally I use ground beef, but this time I decided to use chunks of beef. I got a thick top round piece at my local butcher shop and cut it into 1 inch chunks. I really liked the cubes of meat in the chili – much better than ground meat or even that special “chili grind” some grocery stores have. My homemade chili is definitely NOT traditional. For years & years now I’ve loaded it up with beans, corn, and hominy and thickened it with masa. Between the corn, hominy, & masa, it’s very corny! I know I could omit the meat altogether for a vegetarian chili and still have a hearty meal. For the most part, I make it with canned beans. I’ve found several good low sodium canned bean products readily available at all my local grocery stores. I also include at least two or three Anaheim or poblano peppers purchased from summer farmers markets. I roast and peel them and then freeze them. However, if I run out of my home-processed peppers, I’ll use a small can of chopped green chiles that I've rinsed. I usually serve the chili with a sprinkling of cheese, chopped raw onions & a dollop of sour cream. With some homemade corn bread, it’s a perfect winter meal.

Chili with Beef Chunks

1½ lb. beef (top round, round steak, chuck, etc.) cut into 1 inch pieces
1 onion, chopped
3-5 cloves garlic, minced/crushed
3 cups NSA beef broth (homemade, dry granules, soup base paste concentrate, canned, etc.)
1 can (14 oz.) NSA diced tomatoes
1 tsp. ground cumin (Add more or less to suit individual tastes)
1 tbsp. no-salt chili powder blend (Add more or less to suit individual tastes)
3 cans (15 oz.) low sodium beans, well rinsed (I usually use a can each of red kidney, pinto, & black beans)*
2 cups frozen no-salt corn
1 can (14 oz.) white or yellow hominy, well rinsed
1 can (4 oz.) chopped green chiles, rinsed (Add more or less to suit individual tastes)
¼ cup masa harina combined with ½ cup water or broth

Brown the meat in two or three batches. Don’t overcrowd the pan or else the meat will steam and not brown. Set the meat aside, and in the same pan sauté the chopped onion and crushed garlic. Once the onions are soft, return the meat to the pan and add the equivalent of 3 cups of NSA beef broth. Add one 14 oz. can of NSA diced tomatoes along with the cumin & salt-free chili powder.
Bring the meat mixture to a boil and turn the heat down to simmer. After 30 minutes, check meat for tenderness. If the meat is just about tender, begin adding the remaining ingredients: beans, corn, hominy, and chopped chili peppers. Add more water or broth if necessary. Let mixture simmer for an additional 30 minutes before testing the meat again. If meat is tender, slowly dribble in the masa harina mixture and continue simmering for about 10-15 minutes. The mixture will thicken slightly. Check seasonings and add more chili powder or cumin if desired. Serve immediately or let it sit overnight for all the flavors to meld. Freezes well.

*Cooked dried beans are wonderful. Use an equivalent amount and then freeze the leftovers for another meal.


Sunday, October 26, 2008

Jambalaya

I never tasted jambalaya until I was in my 30s. We were living in San Jose, CA, and from time to time my husband would pick up some ribs and sides from a barbecue joint in nearby Morgan Hill. The ribs were delicious and so was the coleslaw. Once, though, he came home with a side order of jambalaya. It was so good, that it became an instant favorite. At about the same time, I started watching Justin Wilson, the Cajun chef, on a local TV station. I decided to try making jambalaya myself, but I didn't really follow a recipe. I just combined what I saw in the jambalaya from the barbecue joint and some of the info I got from Justin Wilson's show. It turned out pretty good, and I've been making it ever since.

Jambalaya is an easy dish to make without salt because it's filled with a lot of flavorful ingredients. However, traditional jambalaya is often made with both ham and sausage. Obviously, I can't use both of those ingredients in a low sodium version, so I just stick with the sausage. Andouille sausage is the traditional Cajun choice, but sometimes I can't find it. I often opt for using any hot, smoked link sausage available. Here's where portion control is important. A typical jambalaya recipe for four could call for 1/2 pound of sausage or more. I use only about 2 ounces. Whatever I don't use, gets packaged up in about 2 ounce portions and frozen for later use. I also slice the sausage thinly so that almost every bite has a little bit of that flavor.

Jambalaya often includes some shrimp too. That's another sodium rich ingredient. If I decide I really want the flavor, I'll only use a handful of shrimp along with the other ingredients (raw shrimp is lower in sodium than pre-cooked that has been boiled in salt water). Often, though, I just omit it.

Dark Roux
Another key flavoring is the roux. Equal parts of oil and flour are cooked together over medium heat, stirring constantly until the roux turns a very dark brown. This takes a while, but it is necessary to a good tasting jambalaya. I usually make 1/2 cup to 1 cup's worth at a time. The extra can be refrigerated and used for other dishes.

Although I know that it's traditional to cook everything in one big pot, I cook the rice separately. That's the way the barbecue restaurant did it, and that's what I'm accustomed to now. I usually make enough for four servings, so I get two meals out of it.

Jambalaya
(Printable Recipe)

4 chicken thighs (bone-in or boneless, skinless is fine too)
2 oz. smoked spicy sausage, sliced thinly (find the lowest sodium sausage available)
1 large onion, chopped
1 large bell pepper, chopped (any color or combination of colors will do)
2-3 stalks celery, sliced thinly
2-3 cloves garlic, minced
1/2 tsp. dried thyme or to taste
1/4 tsp. cayenne pepper (use more or less according to your taste)
Freshly ground pepper to taste
1 tsp. low sodium Worcestershire sauce
1 tsp. NSA Cajun spice blend (I use The Spice House Cajun blend)
1 (14 oz.) can unsalted diced tomatoes
1 cup NSA chicken broth
1/4 cup oil
1/4 cup flour
Oil for sauteing vegetables & chicken
NSA cooked rice (I use brown rice)

Optional:
8-12 medium raw shrimp, deveined (pre-cooked shrimp may also be used)

Make the roux by combining the flour & oil in a saucepan and cooking over medium heat until the color is a deep, dark brown. Stir frequently. Do not let the mixture burn. This could take 20 minutes or more. Set aside.

In a dutch oven, saute the onion, bell pepper, and celery in about 1 tablespoon oil until soft and tender. Remove vegetables and add chicken to pot; add a bit more oil if necessary. Saute until nicely browned on both sides. Return vegetables to pot, adding garlic and roux. Cook together until garlic begins to give off its fragrance.

Add diced tomatoes, chicken broth, thyme, cayenne pepper, and Cajun spice blend, if using. Cover dutch oven and simmer until chicken is barely tender, about 20 minutes. Add sliced sausage and cook another 10 minutes.

Once chicken is completely tender, add shrimp, if using. Continue simmering just until shrimp is cooked through, about 7-10 minutes. (If the shrimp is already cooked, just add them and take pot off stove. The residual heat from the jambalaya will warm up the shrimp sufficiently.)

Serve over rice.

Saturday, May 31, 2008

Mexican Pork Stew

For some reason last week I came home from the grocery store with a package of country style pork ribs. I wasn't sure what I was going to do with them, but I knew one thing -- it had to be simple. I just wasn't in the mood to fuss. So I turned to my slow cooker. After removing, chunks of excess fat, I threw the ribs into the pot. Then I added one full jar of Trader Joe's NSA Fire Roasted Tomato salsa, turned the cooker on high and busied myself with cleaning house.

A couple of hours later the meat was pretty tender, so I removed the bones. Then I added a can of low sodium pinto beans and a can of white hominy. I had rinsed the beans & hominy well under running water to remove any excess salt. Finally, I chunked up three zucchinis from the farmer's market that I needed to use up. A teaspoon of ground cumin and a handful of chopped cilantro finished the stew. I let everything simmer together for about 30 minutes.

I served it with brown rice and salt free corn tortillas. It made enough for dinner and a couple of lunches. I even froze half for later use. A lot of good food for very little work.

Thursday, May 29, 2008

Lentil Chili

For a few weeks I thought the weather had done its usual Sacramento area thing -- three days of spring, then full blast of hot summer. But we got a welcome reprieve. The last two weeks have been cool again. In fact, it was raining Saturday when I went to our local farmer's market.

On one particularly cold day I wanted to make some chili. I checked my pantry and discovered that I didn't have any beans at all. But I did have lentils. I've read a lot of lentil chili recipes and perfunctorily dismissed them. For some reason they just didn't appeal to me. But here I was, wanting chili, too lazy to go out to the store, and holding a bag of lentils. So I decided to give it a try.

Lentil Chili
(Printable Recipe)

Here's what I did: After rinsing the lentils, I put them in a soup pot, covered them with about 1-2 inches of water and cooked them for just about 20 minutes. I didn't want them to turn to mush.

In a separate pan, I sauteed one small chopped onion, a small chopped bell pepper, and a couple of cloves of minced garlic along with about 2 tablespoons of chili powder and 2 teaspoons of powdered cumin. I use any chili powder mix that is salt free, sometimes Penzey's & sometimes Grandma's.

Once the vegetables were tender, I put them in the lentil pot. Then I added one 8 oz. can of NSA tomato sauce and 1 small can of drained and rinsed diced green chilies. I let all this simmer for about 30 minutes.

When I finally tasted my concoction, I was pleasantly surprised. It tasted pretty good and was a perfect cool weather dinner.

Lentils cook quickly and require no soaking. One reason why they're great to have around for fairly fast bean-type dinners and/or salads.

Tuesday, February 5, 2008

Pork Chile Verde

My freezer was overflowing, so I decided to thaw out some bone-in pork country ribs. I decided to make some chili verde

The Chile Verde is easy, so I make it often. If I'm feeling super ambitious and have actually planned ahead, I roast & peel fresh green chilies. I try to do a lot of chile preparation during the summer months when farmers markets sell them. But many times, I resort to canned. I've found a pretty good brand , Hatch Select Whole Green Chiles (1 chile = 75mg. sodium); I always rinse the chiles well before using them. Today I cooked the verde on top of the stove, but many times, I throw everything into my crock pot.


Pork Chili Verde 
(Printable Recipe)

2 lbs. pork shoulder/country ribs (boneless or bone-in)
1-2 tbsp vegetable oil
NSA chicken broth/stock 
3 canned/fresh green chilies, chopped
1 medium onion, chopped
4 cloves garlic, chopped
Handful of fresh cilantro, coarsely chopped
1 tsp oregano
1 tsp cumin, ground (or to taste)
1/4 c orange juice
2 tbsp lime juice
1 bay leaf

Remove pork's visible fat. (If using pork shoulder, cut into large chunks.) In a dutch oven, brown pork in oil. Add enough broth just to barely cover. Also add the chilies, onion, garlic, cumin, cilantro, oregano, bay leaf, orange juice, and lime juice. Cover pot, and let it cook at a low simmer for about two hours or until pork is quite tender. Remove the cover and let most of the juice evaporate. If possible, spoon out excess fat. Saute the pork in the remaining fat until slightly crisp.

I served the pork in corn tortillas. Corn tortillas are great for low salt diets, lots of flavor but no sodium. I don't fry them; I just steam them a bit in the microwave to soften them. All in all, an easy, tasty, & super low sodium meal.


Monday, February 4, 2008

Barbecued Baked Beans

While rummaging through my pantry, I came across a package of great northern beans and decided to cook them. I'd had good luck using a barbecued bean recipe from Cook's Illustrated, so I figured I'd try it again. Beans are difficult on a low sodium diet. They can taste pretty flat without the salt or smoked meat products -- ham, bacon, ham hocks, etc. But this recipe tasted pretty good because it was highly flavored.

My only complaint with the recipe was that the salt & acidic ingredients (BBQ sauce, brown sugar, mustard, & molasses) were added at the beginning. Most recipes caution against doing this because it will make the beans hard & they won't get tender. I kept those ingredients out until the beans had sufficiently softened.

Anyhow, here's the recipe with my notes.

Barbecued Baked Beans 

Adapted from Cook’s Illustrated 2/2005
Serves 6 to 8
(Printable Recipe)
4 slices bacon
, chopped fine (I either just use 2 slices low sodium bacon or omit altogether)
1 onion
, minced
4 cloves garlic
, minced
1 pound dried small white beans
, rinsed and picked over (See Notes)
8 cups water
1 cup strong coffee
, black
1/2 cup barbecue sauce
(I used 1/2 cup Heinz No Salt Added Ketchup & 1 tsp. The Spice House Salt Free Spicy West Indies Barbecue Seasoning)
1/4 cup packed dark brown sugar
4-1/2 teaspoons brown mustard
, prepared (I used a salt free mustard)
1 tablespoon mild molasses
Hot pepper sauce
(such as Tabasco)
Ground black pepper

1. Adjust an oven rack to the lower-middle position and heat the oven to 300 degrees. Cook the bacon in a large Dutch oven over medium heat until beginning to crisp, about 5 minutes. Stir in the onion and cook until the onion is softened, about 5 minutes.

2. Stir in the garlic and cook until fragrant, about 15 seconds. Stir in the beans, water , coffee, barbecue sauce, brown sugar, mustard, molasses, & 1/2 teaspoon Tabasco. Bring to a boil, scraping up any browned bits. Cover and transfer to the oven. Bake, stirring every hour, until the beans are tender, about 4 hours. (I used slow cooker and cooked beans first without ketchup, mustard & molasses)

3. Remove the lid and continue to bake, uncovered, until the liquid has thickened to a syrupy consistency, 1 to 1 1/2 hours.

Notes : I soaked the beans overnight & rinsed. I cooked them in water for 45 minutes at a very low simmer with 1 bay leaf, 4 small cloves garlic cut in chunks, and a tea ball filled with whole peppercorns, & allspice. I drained them, reserving the cooking water. I sautéed the onion, garlic, & 1/2 a jalapeño pepper in olive oil. I did not use bacon this time. I added the beans & used Pacific Low Sodium Chicken Broth to cover, along with the coffee, and brown sugar. I dumped this all in the slow cooker. I added the molasses, prepared mustard & barbecue sauce (ketchup & spice blend) AFTER the beans became tender. I added 1 tsp. of liquid smoke near the end. I only added ladles of reserved bean cooking liquid if the beans seemed too dry.